Overview
The Strategic Quadrant is an easy-to-use, flexible tool for categorizing similar data elements and assessing them against a set of criteria to provide information for use in planning, prioritization, and decision-making. This guide will teach you how to build and use the Strategic Quadrant. This guide is organized in the following sections:
- Defining Your Strategic Quadrant
- Constructing Your Strategic Quadrant
- Assessing Your Data
- Viewing Your Strategic Quadrant
- Managing Your Strategic Quadrant Models
- Managing Your Profile
1. Defining Your Strategic Quadrant
To create your Strategic Quadrant, you first need to decide how you want to use and define it.
If you haven’t already done so, please review our whitepaper: Driving Success with the Strategic Quadrant. This will provide the information you need to know about quadrant modeling basics, the wide variety of ways you can use the Strategic Quadrant, and guidance for defining your models.
Before you create your model, you need to know:
- The items or data elements you want to analyze
- The name and (optional) description of the model
- Names of the two criteria you want to use to categorize the data in the quadrant:
- The horizontal or “x” axis
- The vertical or “y” axis
- Names for the four quadrants that represent the data categorization:
- Quadrant I (upper right)
- Quadrant II (upper left)
- Quadrant III (lower left)
- Quadrant IV (lower right)
- (Optional) Names and percentages for the scorecard assessment – the second layer of assessment criteria
Related Link: Driving Success with the Strategic Quadrant
2. Constructing Your Strategic Quadrant
Creating Your Model
Once you have defined your Strategic Quadrant’s structure, creating it is simple.
To create your model:
- From the Model List screen, click the “New Model” button.
- Enter a name and description for your model.
- Enter the names you defined for Quadrants I, II, III, and IV.
- Enter the name you defined for the horizontal or “x” axis and the vertical or “y” axis.
- (Optional) Enter the scorecard assessment criteria:
- Enter the name and weight for the first criteria.
- Click the “Add Criteria” button.
- Repeat until all criteria have been entered. The total weight must equal 100%.
- Click the “Save Model” button.

Adding Data to Your Model
Once you have created your model, you are ready to populate it with the data you want to assess. This involves adding:
- Data Sets: Top-level data used to organize the model, also referred to as Level 1
- Data Cards: Lower-level, nested data elements representing the data you want to assess through the model, referred to as Level 2, Level 3, etc.
Best Practices:
- Use consistent grammar for Data Set and Data Card names, and keep names short and simple.
- If you are assessing data that represents capabilities, processes, or something similar, use the form
+ , for example “Manage Scope,” “Manage Schedule,” “Approve Schedule,” etc. - To keep your model manageable and useful, define no more than three or four levels of data elements.
To add Data Sets:
- Click the “Add Data Set” button.
- Enter a name for your Data Set.
- Click the “Save” button.
- Repeat to create additional Data Sets.
Your Data Sets will be created and automatically numbered, for example 1, 2, 3, etc.

To add Level 2 Data Cards: 1. Hover over the Data Set in which you want to add a Data Card. 2. Click the “Add a Data Card” link. 3. Enter a name for your Data Card. 4. Click the “Save” button. 5. Repeat to create additional Data Cards.
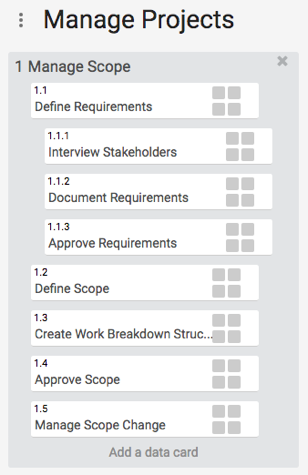
Your Data Cards will be added and automatically numbered with the number of their Data Set followed by a decimal and another number, for example 1.1, 1.2, 1.3, etc.

To add lower-level Data Cards:
- Hover over the Data Card to which you want to add a child.
- Click the “+” to the right of the Data Card.
- Enter a name for your Data Card.
- Click the “Save” button.
- Repeat to create additional Data Cards.
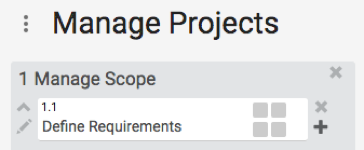
Your Data Cards will be added and automatically numbered based on their parent’s number, for example 1.1.1, 1.1.2, 1.1.3, etc.
Adding Descriptions and Comments
To add a description to your Data Card:
- Click on the Data Card you want to add the description to.
- Enter a description and click the “Save” button.

To add a comment to your Data Card:
- Click on the Data Card you want to add a comment to.
- Enter a comment and click the “Comment” button.
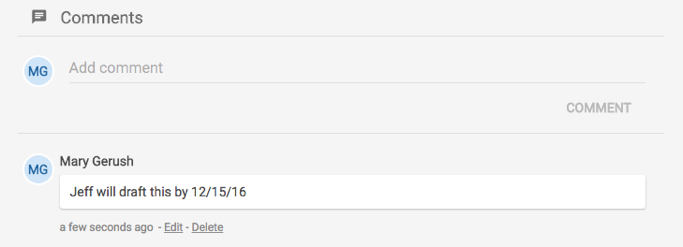
When you view a Data Card with comments in your Strategic Quadrant, it will display with a flag in the upper right corner, indicating comments have been added.

Managing Data Sets and Data Cards
To rename a Data Set:
- Click the name of the Data Set you want to rename.
- Edit the Data Set Name.
- Click anywhere else to save the name.
To delete a Data Set:
- Click the “x” at the top right of the Data Set you want to delete.
- Click the “Yes” button.
To rename a Data Card:
- Hover over the Data Card you want to rename.
- Click the “pencil” to the left of the Data Card.
- Edit the Data Card name.
- Click the “Save” button.
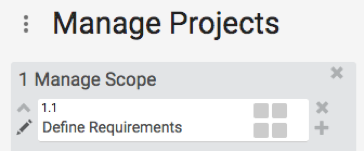
To delete a Data Card:
- Hover over the Data Card you want to delete.
- Click the “x” to the right of the Data Card.
- Click the “Yes” button.
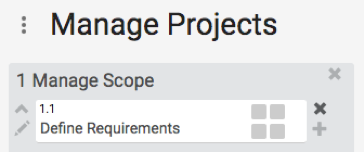
** Collapsing and Expanding Levels **
You can collapse lower-level Data Cards to simplify the view of your assessment model. You can also expand them again to reveal more detail.
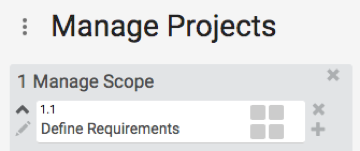
To collapse a Data Card’s children:
- Hover over the “parent” Data Card.
- Click the “^” to the left of the Data Card.
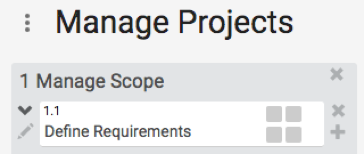
To expand a Data Card’s children:
- Hover over the “parent” Data Card.
- Click the “v” to the left of the Data Card.
Reordering Data Sets and Data Cards
Data Sets and Data Cards can be dragged and dropped to reorder them and change their relationships to one another.
Tips:
- To reorder Data Sets, drag and drop left to right. When you see a dark rectangle where you want to drop the Data Set, release it.
- To change the location of Data Cards in a Data Set, drag and drop them up or down. When you see a dark rectangle where you want to drop the Data Card, release it.
- If you want to make a Data Card a “child” of another Data Card, drag and drop the Data Card onto the “parent.”
- Lower-level Data Cards are moved with their parents when you drag and drop them.
- You can move Data Cards and their children from one Data Set to another.
- When Data Sets and Data Cards are reordered, they will be automatically renumbered to represent their new position in the model.
3. Assessing Your Data
Once your Strategic Quadrant has been defined, you are ready to assess the information on your Data Cards against the criteria you defined. Assessments provide valuable information your team can use to aid in planning, prioritization, and decision-making efforts.
There are two levels of assessment:
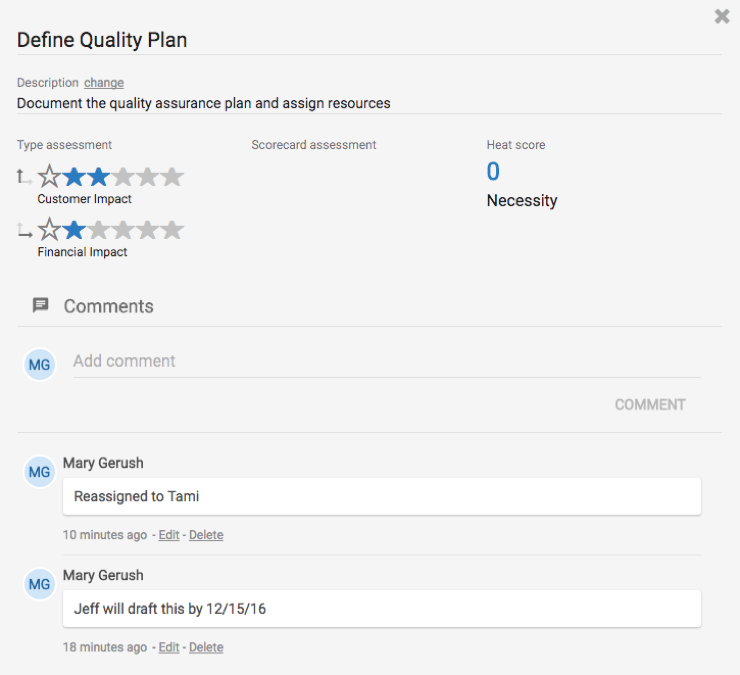
Assessing for Category or Type: The first involves assessing your Data Cards against the criteria you defined for the horizontal or “x” axis and the vertical or “y” axis. This will categorize the information represented on the Data Card into one of four quadrants.
Assessing Against your Scorecard Criteria: The second involves scoring your Data Cards against the additional scorecard criteria you defined. This will determine a Data Card’s performance against your chosen criteria.
Related Link: Driving Success with the Strategic Quadrant
Assessing for Category or Type
To assess a Data Card for categorization in the Strategic Quadrant:
- Open the Data Card by clicking on it.
- Select the number of stars (1 through 5) you want to assign to the Data Card based on the criteria you defined for the horizontal or “x” axis and the vertical or “y” axis.
- Click the “x” in the upper right corner of the Data Card to close it.
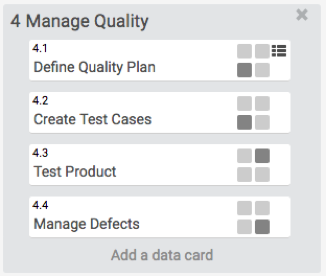
When you assess a Data Card against the criteria you defined, it will be categorized in one of the four quadrants on the model based on it scores. The Data Card’s type is displayed on the Data Card detail screen. It is also indicated graphically on the model.
Assessing for Performance
To assess a Data Card for performance against your scorecard criteria:
- Open the Data Card by clicking on it.
- Select the number of stars (1 through 5) you want to assign to the Data Card based on the criteria you defined for the scorecard assessment.
- Click the “x” in the upper right corner of the Data Card to close it.
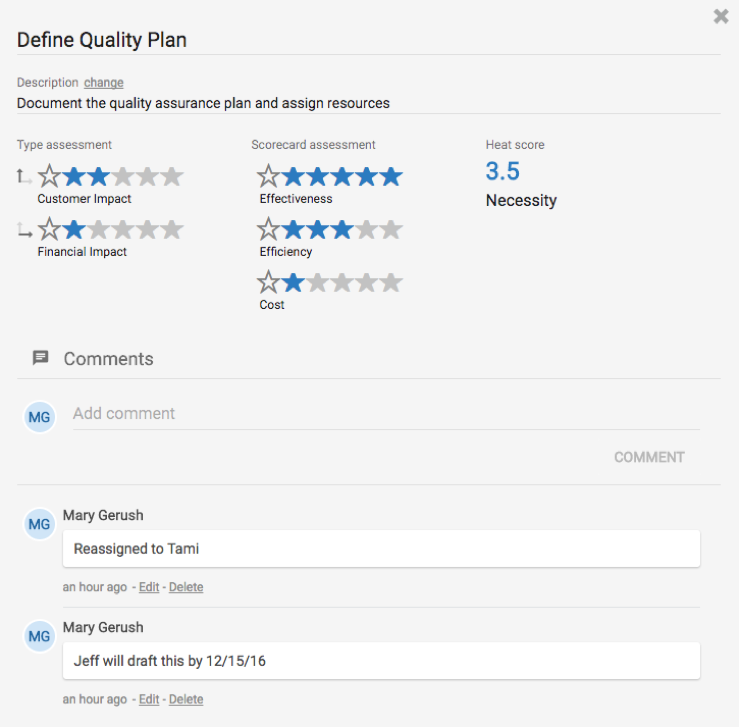
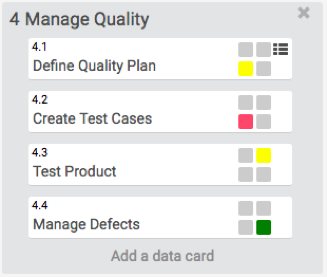
When you assess a Data Card against the scorecard criteria you defined, a calculation determines its “heat score.” This score is displayed on the Data Card detail screen. It is also indicated on the model as “green,” “yellow,” or “red,” depending on its score.
Tips:
- You can remove a Data Card’s assessment scores by clicking the empty stars.
- It is helpful to add comments as your team assesses Data Cards, so you have a record of why you scored them the way you did.
4. Viewing Your Assessment
After assessing your Strategic Quadrant, you are ready to use it. You can generate a graphic of your Strategic Quadrant model for use in planning meetings and presentations. You can also export your model to Microsoft Excel to do more detailed analysis of the model and your assessments.
Exporting to a Graphic
- Click the menu icon to the left of the model’s name.
- Click the “Image” option.
- Name the image and select where you want to save it.
- Click the “Save” button.
Exporting to Microsoft Excel
- Click the menu icon to the left of the model’s name.
- Click the “Excel” option.
- Name the image and select where you want to save it.
- Click the “Save” button.
5. Managing Your Models
After you have created one or more models, you can access them through the Model Directory, which is the first screen that is displayed when you sign in to the tool. From that screen, you can open and delete your models.
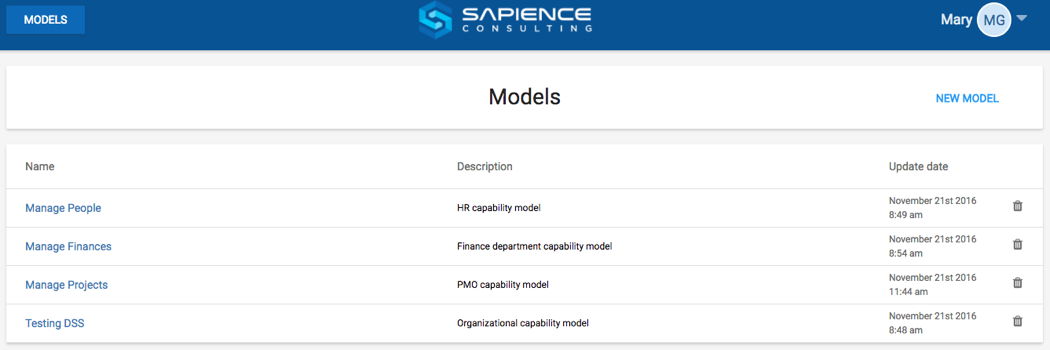
Tip: At any time, you can return to the Model Directory screen by clicking the “Models” button at the upper left of your screen.
Opening a Model
- Hover over the model name.
- Click the hyperlink.
Editing a Model’s Structure
- Open the model you want to edit.
- Click the menu icon to the left of the model’s name.
- Click the “Set Up Model” option.
- Edit the model’s name, description, assessment quadrant, or scorecard information.
- Click the “Save Model” button.
Deleting a Model
- Click the “trash can” icon to the right of the model you want to delete.
- Click the “Delete” button.
Managing Access to Your Models
You can share your models with other people who have signed up to use the Strategic Quadrant Tool.
To grant someone access:
- Open the model you want to grant access to.
- Click the menu icon to the left of the model’s name.
- Click the “Manage Members” option.
- Click the “Add Member” button.
- Enter the email address of the person you want to grant access.
- Click the “Add” button.
- Click the “Give Privilege” button.
To remove access:
- Open the model you want to remove a member’s access.
- Click the menu icon to the left of the model’s name.
- Click the “Manage Members” option.
- Click the “Remove Privilege” button to remove access but leave the member on the access list or click the “X” button to remove the member completely.

6. Managing Your Profile
You can access your Profile to update your personal information and password or sign out of the tool from any screen.
Updating Your Profile
- From any screen, click your user name displayed at the top right of the screen.
- Click the “Profile” option.
- Edit your profile information.
- Click the “Save” button.
Changing Your Password
- From any screen, click your user name displayed at the top right of the screen.
- Click the “Profile” option.
- Type your old and new passwords.
- Click the “Save” button.
Logging Out
- From any screen, click your user name displayed at the top right of the screen.
- Click the “Logout” option.
For More Information
For more information on using the Strategic Quadrant, please review the following documents:

